Bloqade is a Julia Language package developed for quantum computation and quantum simulation based on the neutral-atom architecture with the ability to submit tasks to QuEra’s Aquila quantum processor. Bloqade is available working out-of-the-box through qBraid Lab, is free-to-use, and requires little to no setup. Built on top of Ubuntu Server 20.04 LTS, this image includes:Documentation Index
Fetch the complete documentation index at: https://docs.qbraid.com/llms.txt
Use this file to discover all available pages before exploring further.
- The latest version of Julia and Bloqade
- Yao.jl
- Revise.jl
- BenchmarkTools.jl
- PythonCall.jl
- Conda package manager, provided by Mamba
- Jupyter Lab interface with dedicated Julia and Python kernels
- Integrated Terminal for interactive command-line sessions
Step 0: Redeem Access Key
Login to account.qbraid.com. On the left side of your dashboard, inside the Plan card, click Manage.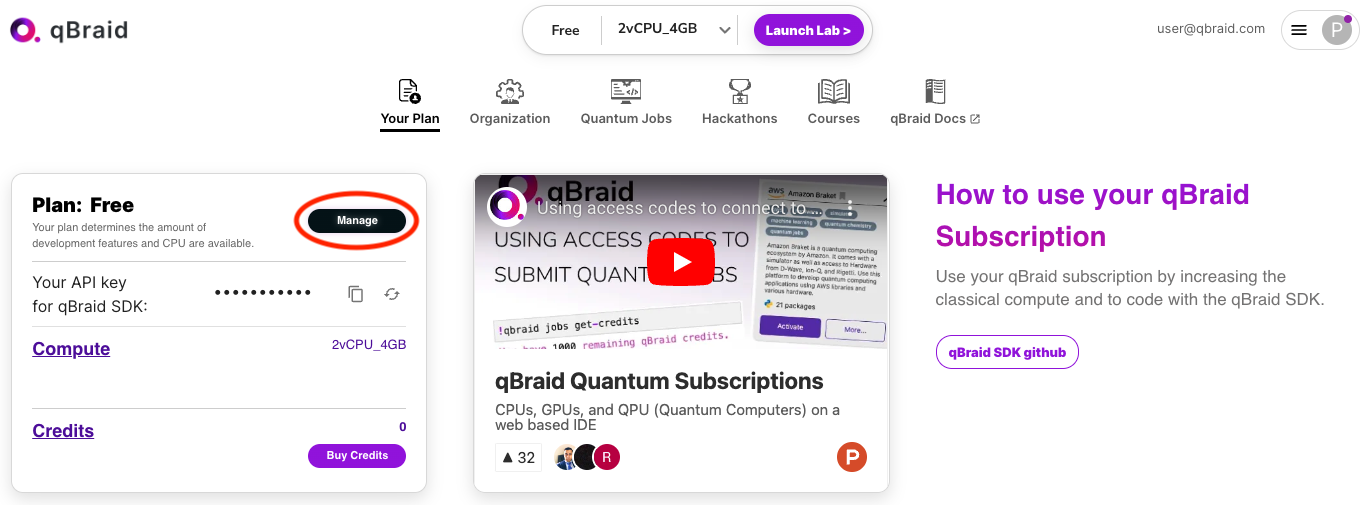
Scroll down to find the card marked Access Key. Enter code
NEUTRALATOM and click Submit. This will grant you access to the
Bloqade Lab image as well as a number of other premium features.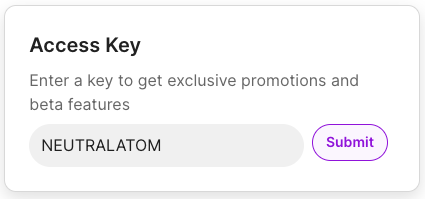
Step 1: Select Image & Launch Lab
At the top of your account page, open the image drop down. Select the option named Bloqade_2vCPU_4GB, and then click Launch Lab. Pulling the Bloqade image may take 2-3 minutes the first time. The next time you launch Lab, it will load much more quickly.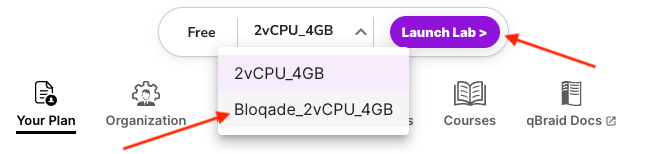
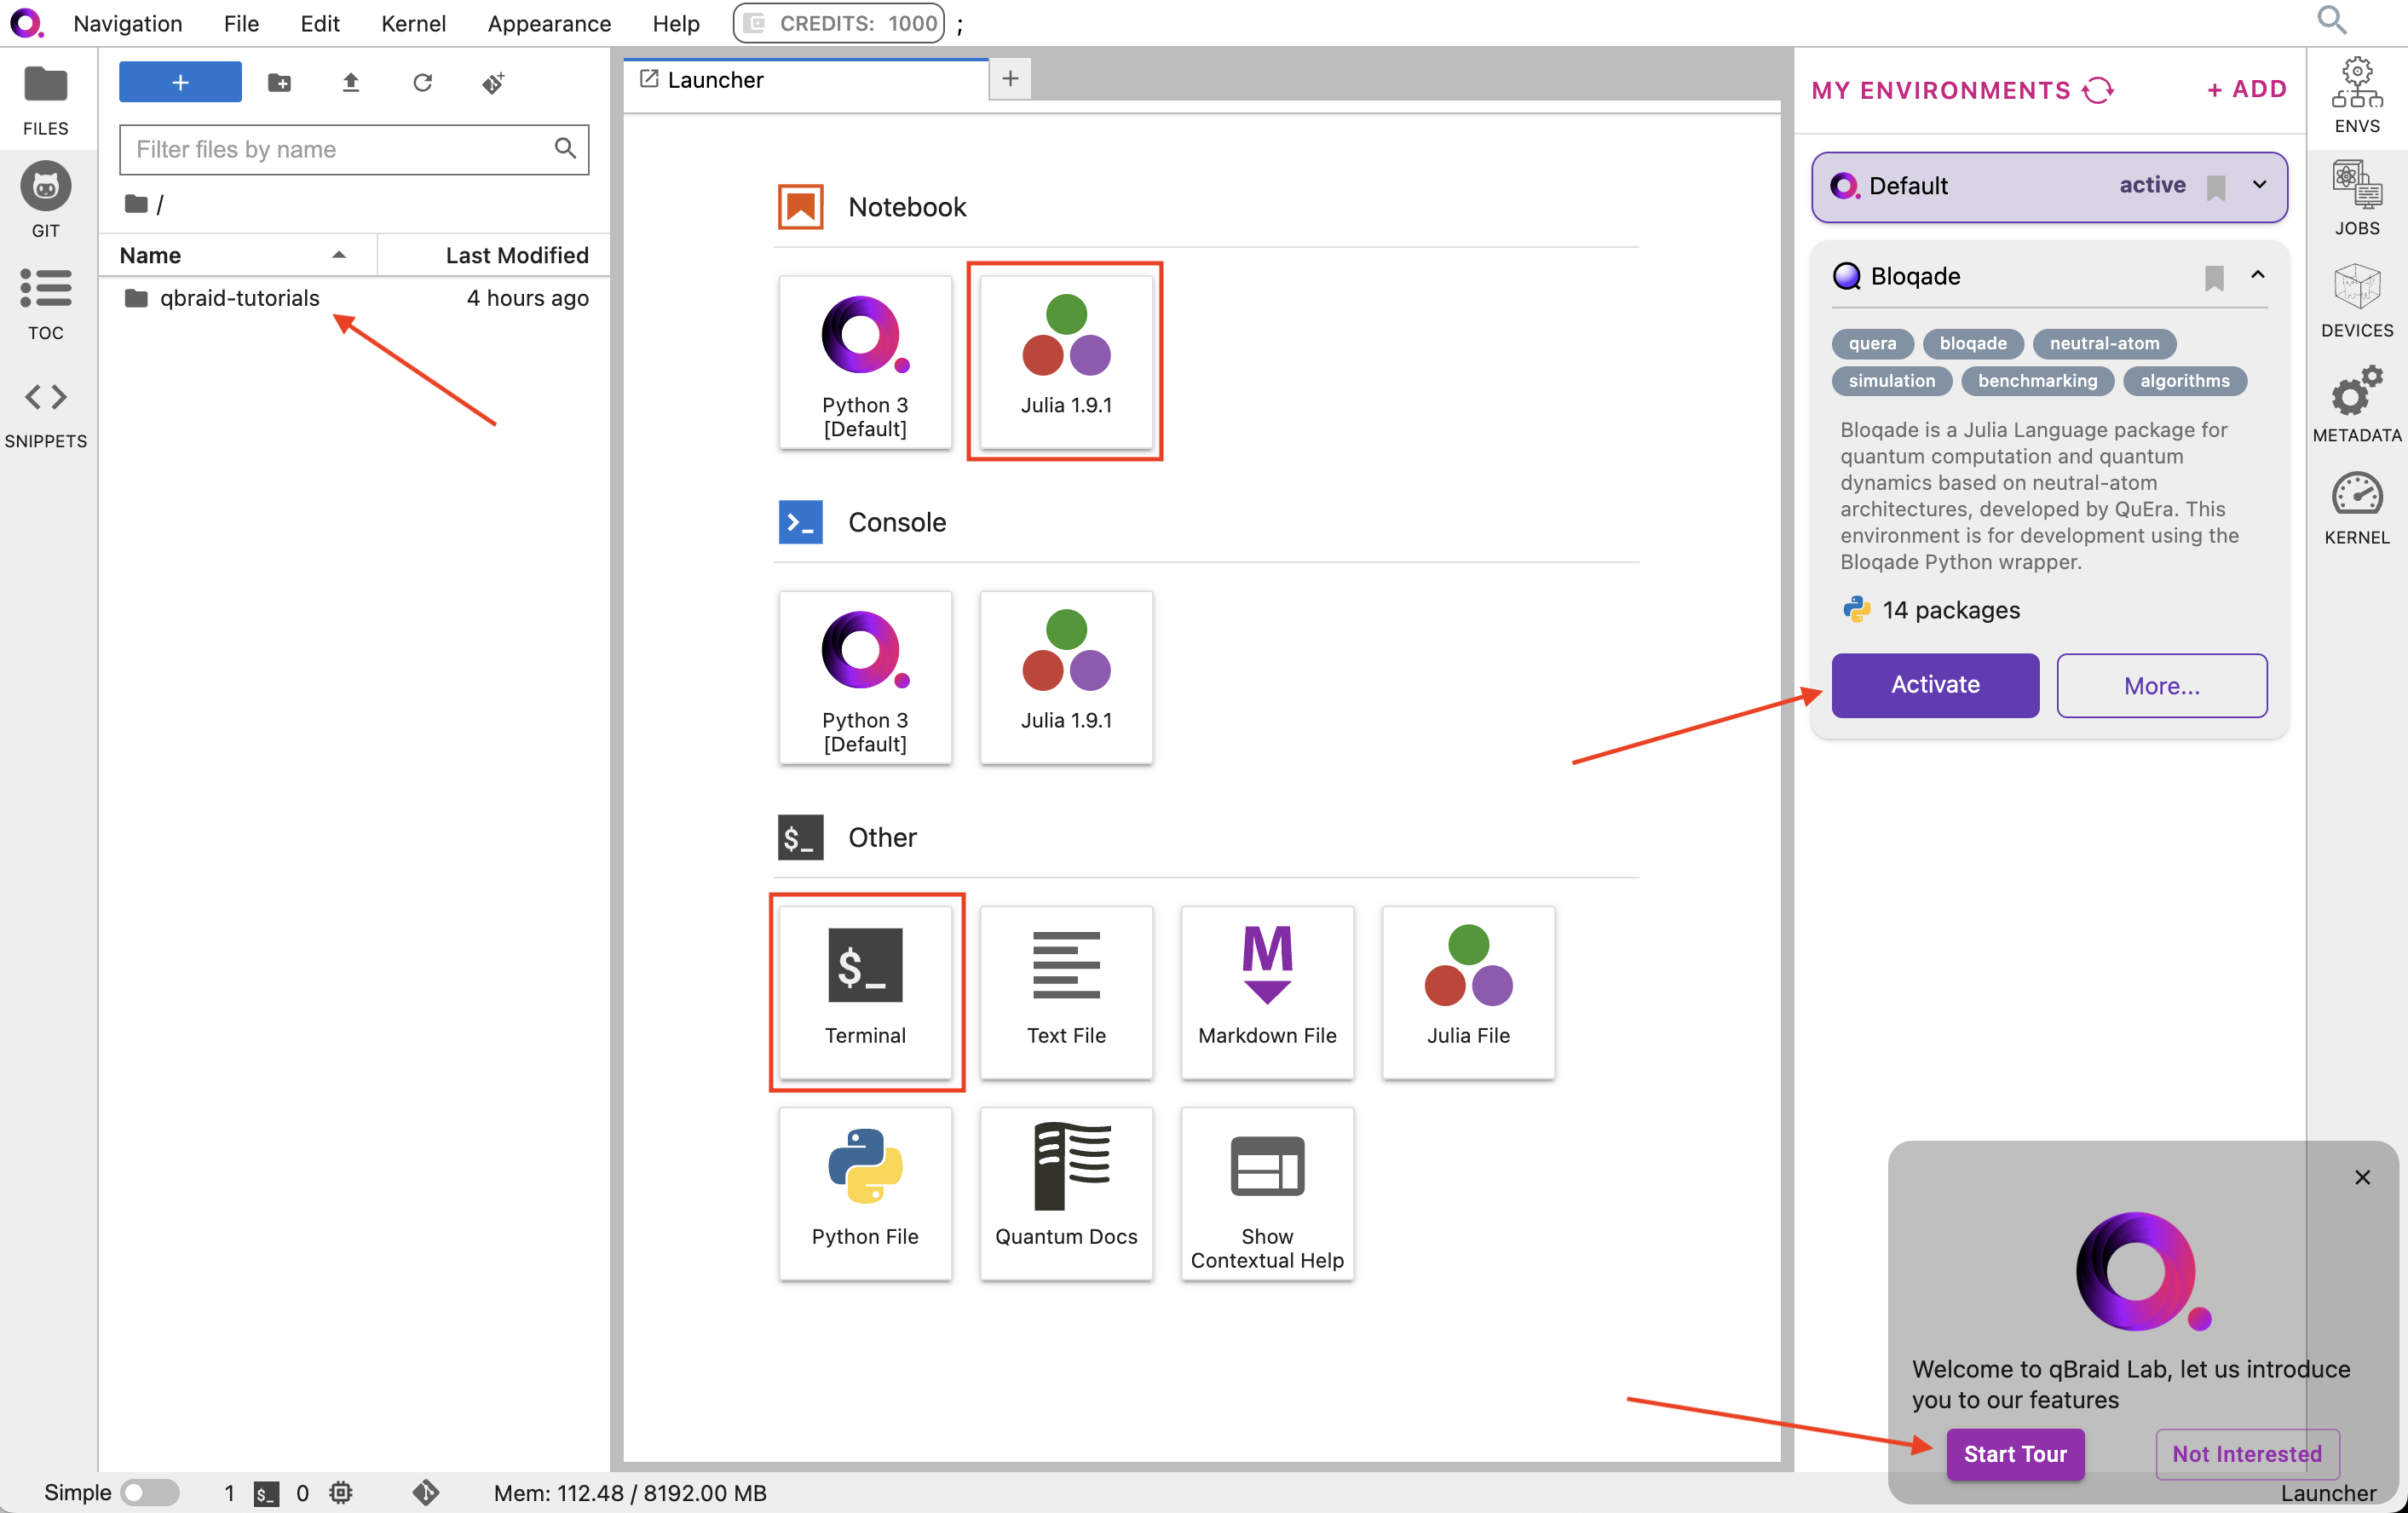
Step 2: Develop with Notebooks or from Command Line
Once qBraid Lab is loaded, you are all set! No further setup is required. In the middle of your screen you can click the Julia 1.9 kernel to open a new Jupyter Notebook configured with the Julia executable. Alternatively, you can click to open Terminal and run an interactivejulia session from the command-line. In this qBraid Lab image, Bloqade is pre-installed and pre-compiled, so you should be able to get started
using Bloqade right away.
Step 3: Explore More Features
The Environment Manager, located in the right sidebar of qBraid Lab, provides a graphical user interface for creating and managing Python virtual environments. This particular Lab image comes with a pre-installed Bloqade Python Wrapper environment. Clicking Activate will create a corresponding IPykernel, and allow you to run Jupyter Notebooks using thebloqade Python package.
In the bottom right corner qBraid Lab, click Start Tour for an interactive walkthrough. You can re-start the tour and access other useful
links from the Help drop-down in the top menu bar. To stop and/or restart your session, click File > Hub Control Panel > Stop My Server.
For more on the qBraid Lab interface, and managing your qBraid Lab session, see Getting Started.